This Professional 5DOF Robotic Arm have three Parts Download Project Codes for arduino
http://www.mediafire.com/file/4x7scgduwiblzrv/Robot_Arm.rar/file
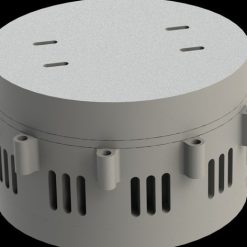
Part 1 OF Professional 5DOF Robotic Arm
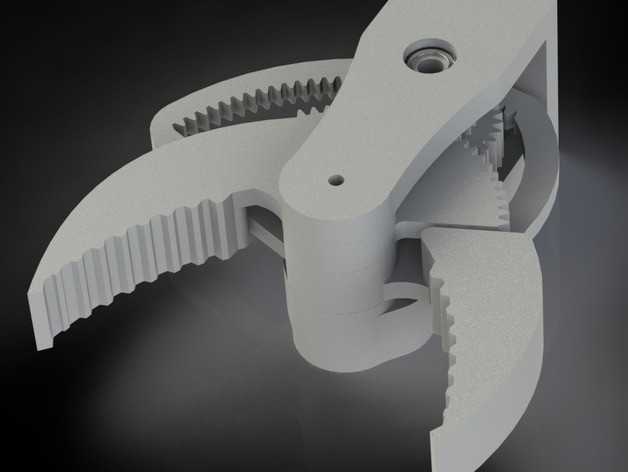
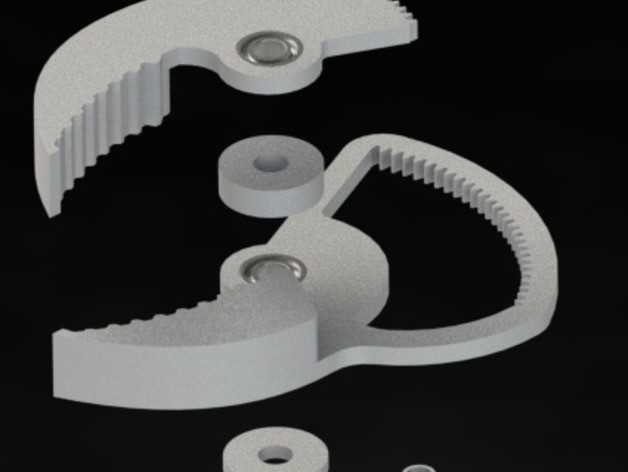
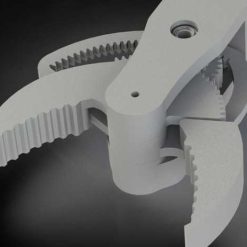
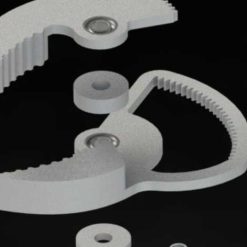
This is the first file publish of my robotic arm series. This component is the gripper of the robotic arm, it is based on the mantis gripper from 4ndreas
The following hardware will be needed to assemble the gripper:
- M3 x 25mm round head(2x)
- M3 x 10mm countersunk (1x)
- M3 x 10mm round head (2x)
- M3 x 8mm round head (4x)
- 8mm x 16mm x 5mm bearing, 688zz (3x)
The following electronic parts will be needed:
- Standard size servo (1x), e.g. TowerPro MG995
Notes:
- Print the bearing top-bottom bushing twice!
- All critical holes are oversized by 0.25mm to guarantee an easy fit. For example, the bearing guide is 8mm, both the holes in the servo mount and cover plate are 8.25mm in diameter.
- All the M3 holes are sized 2.8mm in diameter. Apply some grease (not necessary, but it makes it easier) on a normal bolt and screw them in the parts with some proper tools. This should make some neat and tight threads in the plastic.
- While assembling, make sure your servo is aligned properly.
- The hole in the driving gear will be quite a bit smaller than the diameter of the servo gear, this can make it hard to get it to fit properly. I used a longer M3 bolt so that it is sticking out a millimeter or 3 beyond the bottom of the gear. This way you will be able to use the the bolt to get the gear into place, without having to hammer it on the servo. Once the gear sits reasonably well you could use a shorter screw so that you won’t jam the servo.
Part 2
The following hardware will be needed to assemble the gripper:
- M3 x 10mm round head(25x)
- M3 x 8mm round head (8x)
- M3 x 3mm grub screw (1x)
- M4 x 3mm grub screw (1x)
- M4 x …mm (5x), length for bottom plate bolts will depend on your wooden base plate thickness.
- 10mm x 30mm x 9mm bearing, 6200zz (2x)
- 10mm steel balls (10x)
The following electronic parts will be needed:
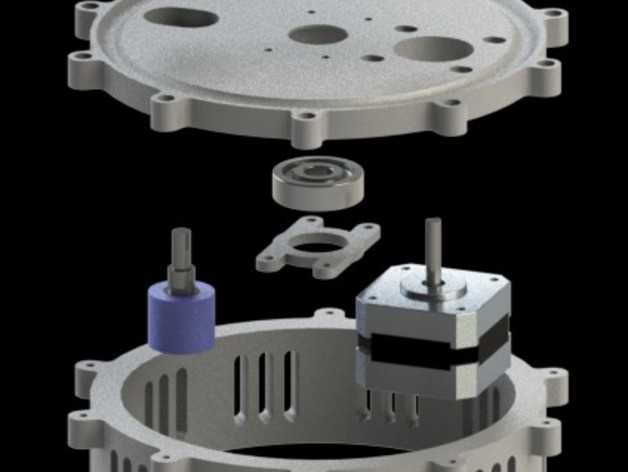
- Nema 17 (34mm height) stepper motor
- BOURNS 3590S 10 turn potentiometer
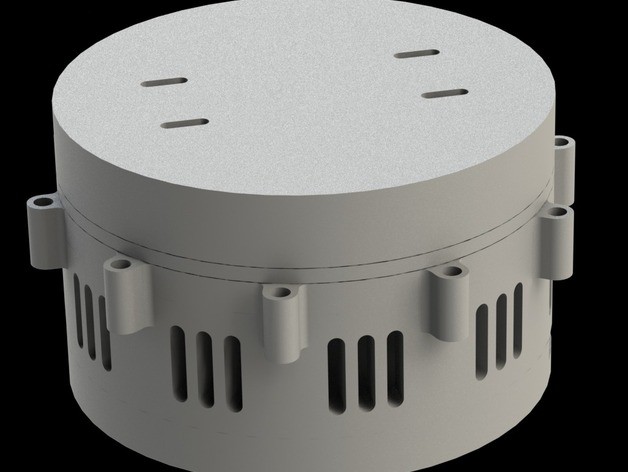
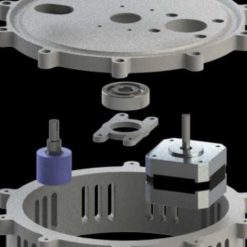
The assembly should be pretty straight forward, just follow the exploded view. Questions?? Message me!
Notes:
- Print the bearing clamp twice!
- All critical holes are oversized by 0.25mm to guarantee an easy fit.
- All the M3 / M4 holes are sized 2.8mm / 3.8mm in diameter. Apply some grease (not necessary, but it makes it easier) on a normal bolt and screw them in the parts with some proper tools. This should make some neat and tight threads in the plastic.
- While assembling, make sure the potentiometer is rotated to the center (5 turns). Next align the notch of the rotating plate with the potentiometer and push the rotating plate in place.
- Apply some light oil or grease on the 10mm steel balls.
Part 3
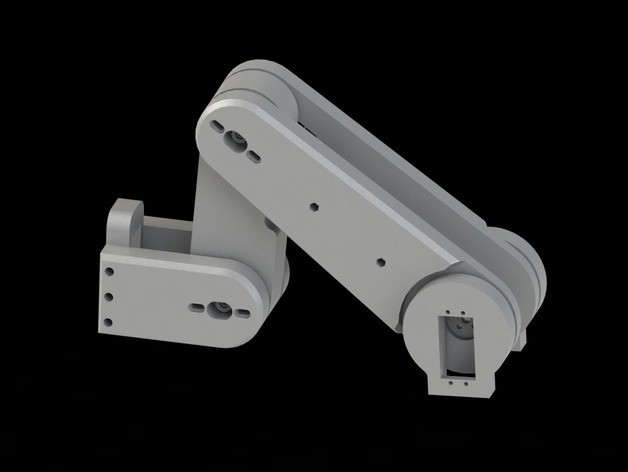
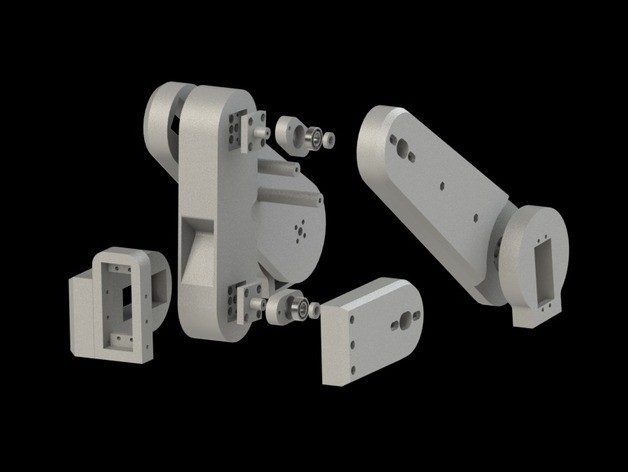
This is the third, and last, file publish of my robotic arm series. This component is the arm of the robotic arm.
The following hardware will be needed to assemble the arm:
- M3 x 8mm round head(22x), 20 used to mount the servo horns (including the gripper)
- M3 x 10mm round head(34x)
- M3 x 63mm round head (2x)
- M3 x 16mm round head (4x)
- M3 nut (2x)
- M4 x 16mm round head(4x)
- 8mm x 16mm x 5mm bearing, 688zz (2x)
The following electronic parts will be needed:
- Standard size servo (5x), e.g. TowerPro MG995
The assembly should be pretty straight forward, just follow the exploded view. Questions?? Message me!
Notes:
- Print the base servo mount, bearing holder, center arm bearing guide, center arm bearing guide clamp and the lower arm bushing twice.
- All critical holes are oversized by 0.25mm to guarantee an easy fit.
All the M3 / M4 holes are sized 2.8mm / 3.8mm in diameter. Apply some grease (not necessary, but it makes it easier) on a normal bolt and screw them in the parts with some proper tools. This should make some neat and tight threads in the plastic. - This design is not fully tested, so it might undergo some changes in the future.
- It’s best to put support in round shaped overhangs, for example you should place the center arm with the circular indent face down on your print bed and then add supports. After printing you can grind down any residue of support material with a dremel tool or something similar.
Package Include:
- Standard size servo (6x) TowerPro MG996R
- Nema 17 (34mm height) stepper motor
- 10k turn potentiometer
- The following hardware will be needed to assemble the gripper: These items also include in Package
- M3 x 25mm round head(2x)
- M3 x 10mm countersunk (1x)
- M3 x 10mm round head (2x)
- M3 x 8mm round head (4x)
- 8mm x 16mm x 5mm bearing, 688zz (3x)
- The following hardware will be needed to assemble the Base:
- M3 x 10mm round head(25x)
- M3 x 8mm round head (8x)
- M3 x 3mm grub screw (1x)
- M4 x 3mm grub screw (1x)
- M4 x …mm (5x), length for bottom plate bolts will depend on your wooden base plate thickness.
- 10mm x 30mm x 9mm bearing, 6200zz (2x)
- 10mm steel balls (10x)
- The following hardware will be needed to assemble the arm:
- M3 x 8mm round head(22x), 20 used to mount the servo horns (including the gripper)
- M3 x 10mm round head(34x)
- M3 x 63mm round head (2x)
- M3 x 16mm round head (4x)
- M3 nut (2x)
- M4 x 16mm round head(4x)
- 8mm x 16mm x 5mm bearing, 688zz (2x)
Other Products:
Be the first to review “5 Degree of Freedom Engineering Robotic arm” Cancel reply
Related products
Quadcopter & Parts
Connecting Interface and Wires
Quadcopter & Parts
VANWEI VK-162 Notebook Usb GPS Navigation Module Google Earth
Quadcopter & Parts
FS-GT2B AFHDS 2A 3CH Transmitter for Rc Car Boat With Receiver
Connecting Interface and Wires
Bullet Connector Set – 3.5mm Male-Female for Brushless Motor & ESC





Reviews
There are no reviews yet.