


5DOF Robot Arm In this tutorial we will learn how to make an Arduino Robot Arm which can be wirelessly controlled and programmed using a custom-build Android application. I will show you the entire process of building it, starting from designing and 3D printing the robot parts, connecting the electronic components and programming the Arduino, to developing our own Android application for controlling the Robot Arm.
Overview OF 5DOF Robot Arm
Using the sliders in the app we can manually control the movement of each servo or axis of the robot arm. Also using the “Save” button we can record each position or step and then the robot arm can automatically run and repeat these steps. With the same button we can pause the automatic operation as well as reset or delete all steps so that we can record new ones.
Arduino Robot Arm 3D Model
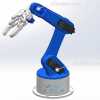
To begin with, I designed the Robot Arm using Solidworks 3D modeling software. The arm has 5 degrees of freedom.
For the first 3 axis, the waist, the shoulder and the elbow, I used the MG996R servos, and for the other 2 axis, the wrist roll and wrist pitch, as well as the gripper I used the smaller SG90 micro servos.
Metal 2 DOF Robot Mechanical Arm Gripper Clamp Kit with 3 Servo
| CHOOSE | FULL ARM WITHOUT MOTORS, FULL ARM WTH MOTORS, ASSEMBLED WITH FULL WORKING |
|---|
Be the first to review “DIY Arduino Robot Arm 5 degrees of freedom 5DOF”
Related products


Quadcopter & Parts
DJI 920KV Brushless Motor CW/CCW for DJI Phantom 2 3 F450 F550 Quadcopter


Motors,DC Fan, Pumps
N60 Gear Brushed Motor for Diagnostic Equipment ( replacement of N20 Gear Motor)


Connecting Interface and Wires
Bullet Connector Set – 3.5mm Male-Female for Brushless Motor & ESC


Quadcopter & Parts
FS-GT2B AFHDS 2A 3CH Transmitter for Rc Car Boat With Receiver


Robotics & Parts

Quadcopter & Parts


Quadcopter & Parts
Emax RS2205-2300 2205 2300KV Racing Edition CW/CCW Brushless Motor


Connecting Interface and Wires

Reviews
There are no reviews yet.